HOW TO USE PROCREATE
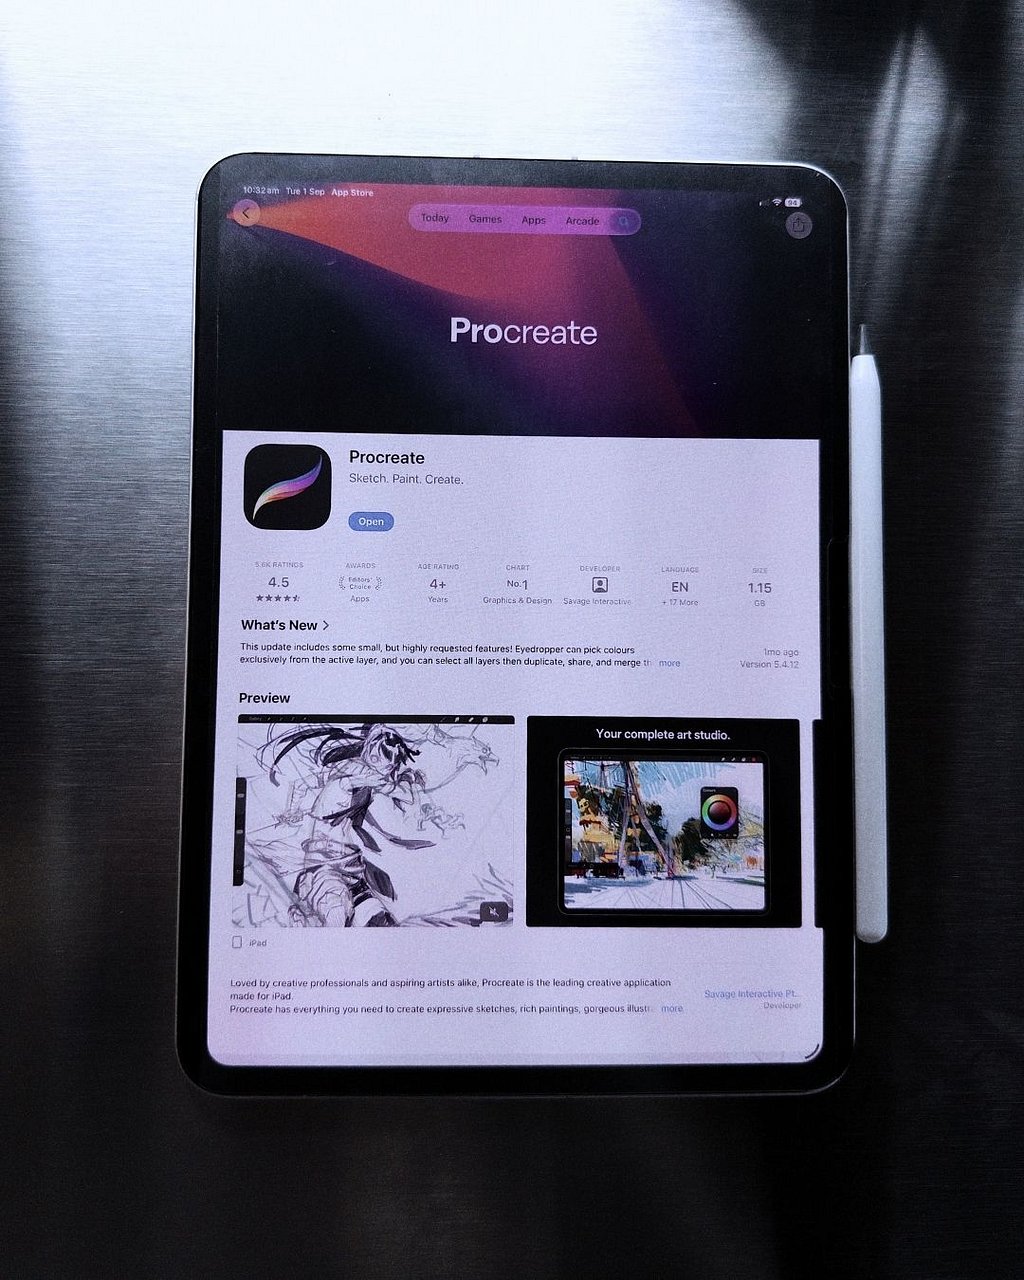
Head to the App Store on your iPad, search for 'Procreate', and download it. It’s a one-time purchase, no subscriptions or recurring fees. Once installed, make sure your Apple Pencil is paired and charged before launching the app.
Want to know why I made procreate brushes? Click the button below.
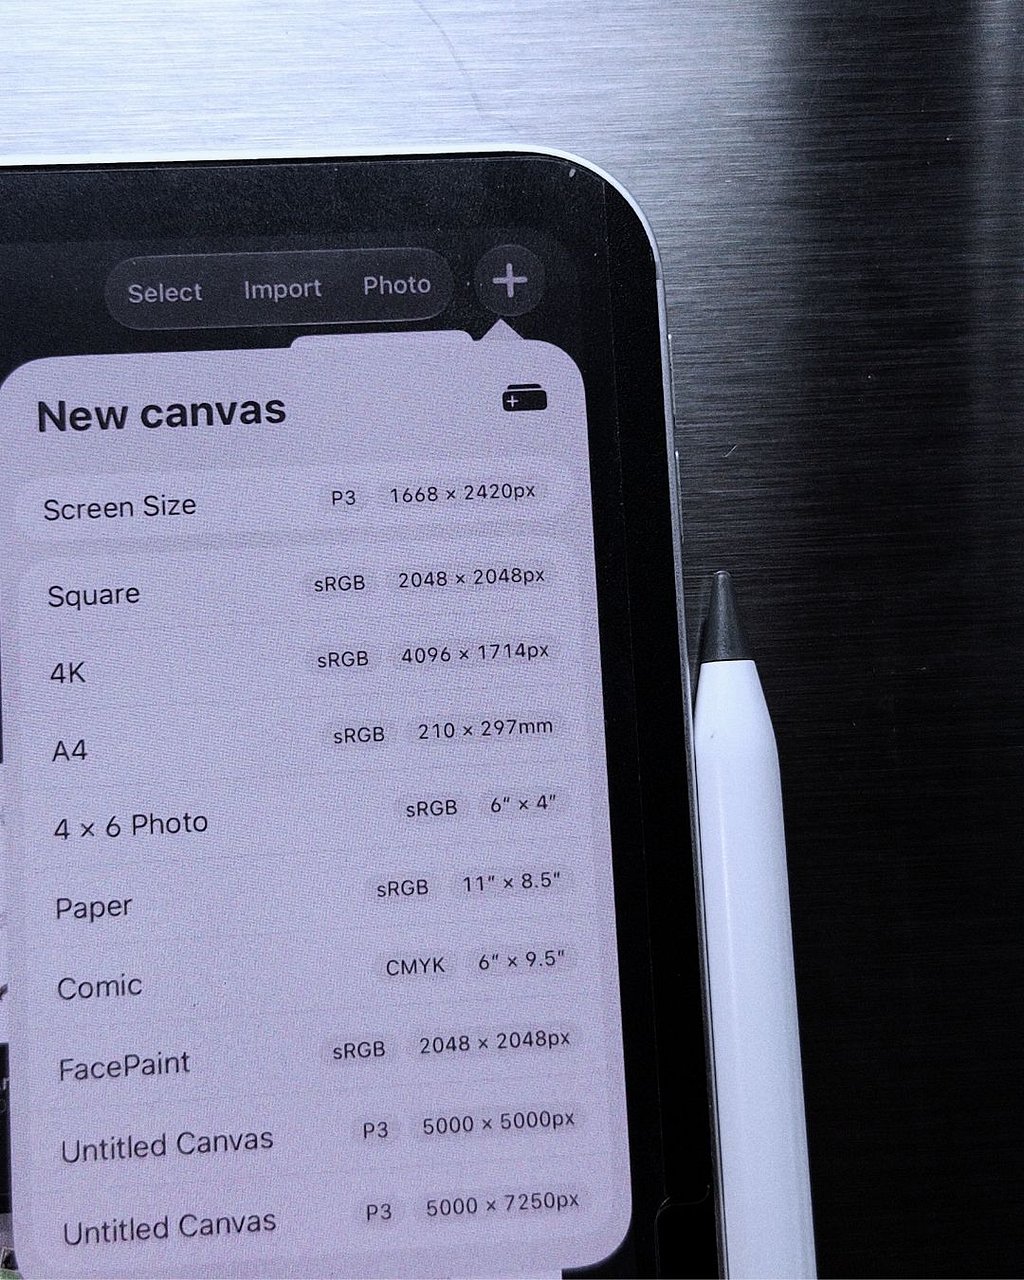
From the main Procreate Gallery view, tap the + icon in the top-right corner to open the New canvas menu.
-
You can select default presets like Screen Size, Square, or standard A4 for quick sketching.
-
To create a custom canvas with exact dimensions tailored for high-res art prints, tap the small rectangular custom canvas icon (
+inside a box) in the top-right corner of this dropdown.

Setting your canvas size right from the start ensures your digital work can be printed as physical artwork without looking pixelated or blurry:
-
Dimensions: Set your custom pixel dimensions (e.g., 5000 x 7250 px for large poster-sized scaling).
-
DPI: Always set this to 300 DPI. 300 DPI is the global standard for sharp physical printing.
-
Maximum Layers: Keep an eye on your layer count. Larger dimensions give higher detail but reduce your maximum layer limit based on your iPad's RAM.
-
Tap the blue checkmark in the top right to open your blank canvas.
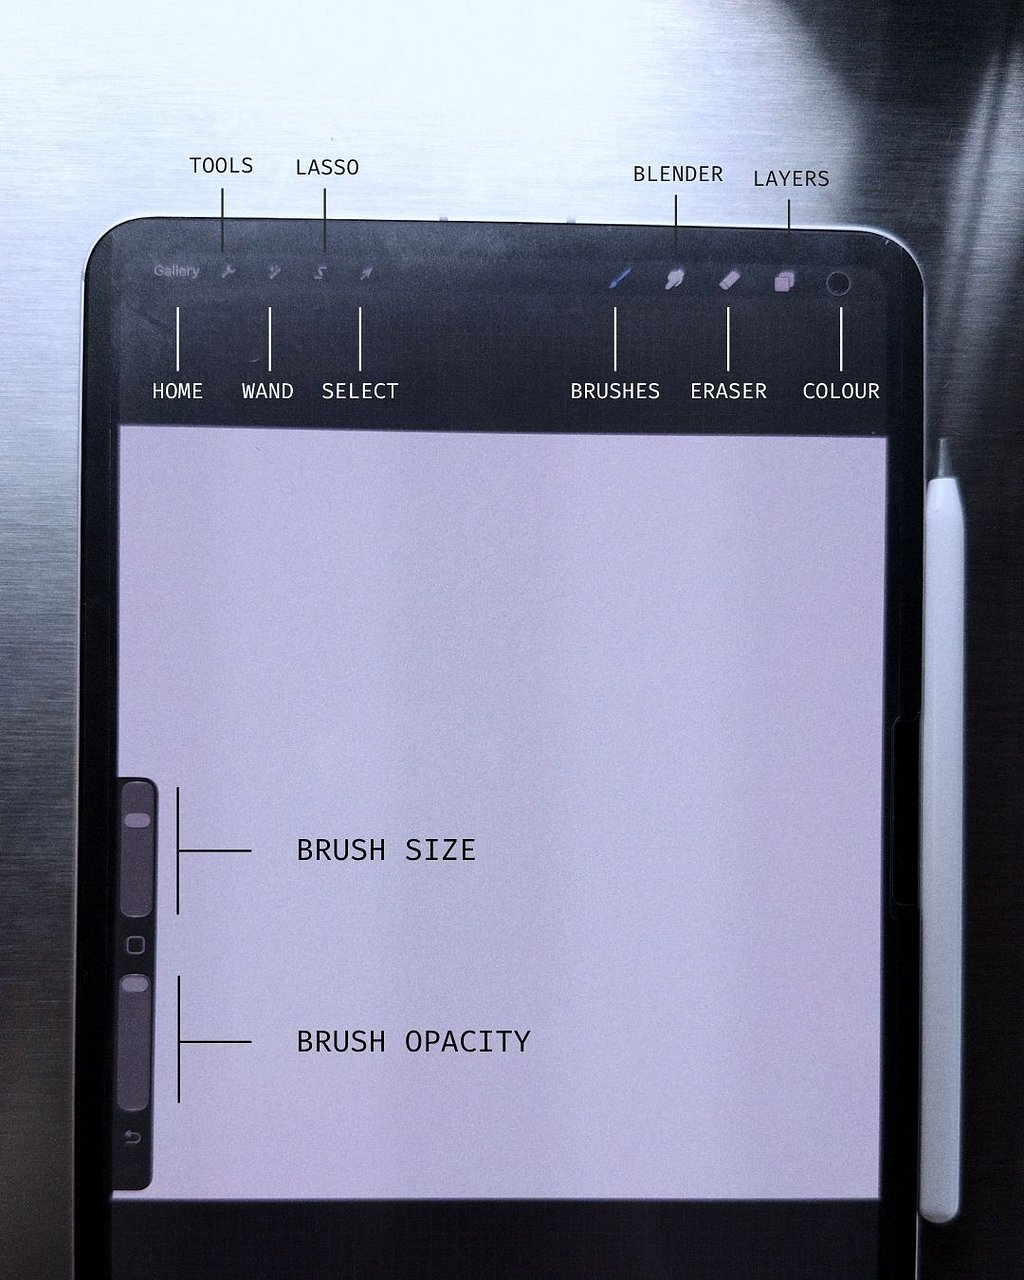
Top Left Hub | Controls & Editing:
-
-
Home (Gallery): Takes you back to your main project folder.
-
Tools (Wrench): Canvas settings, photo importing, pressure curves, and exporting.
-
Wand (Adjustments): Blurs, color balance, noise, and opacity controls.
-
Lasso (Selections): Freehand and automatic selection tools.
-
Select (Arrow / Transform): Moves, scales, and repositions active linework or imported photos.
-
Top Right Hub | Drawing & Layers:
-
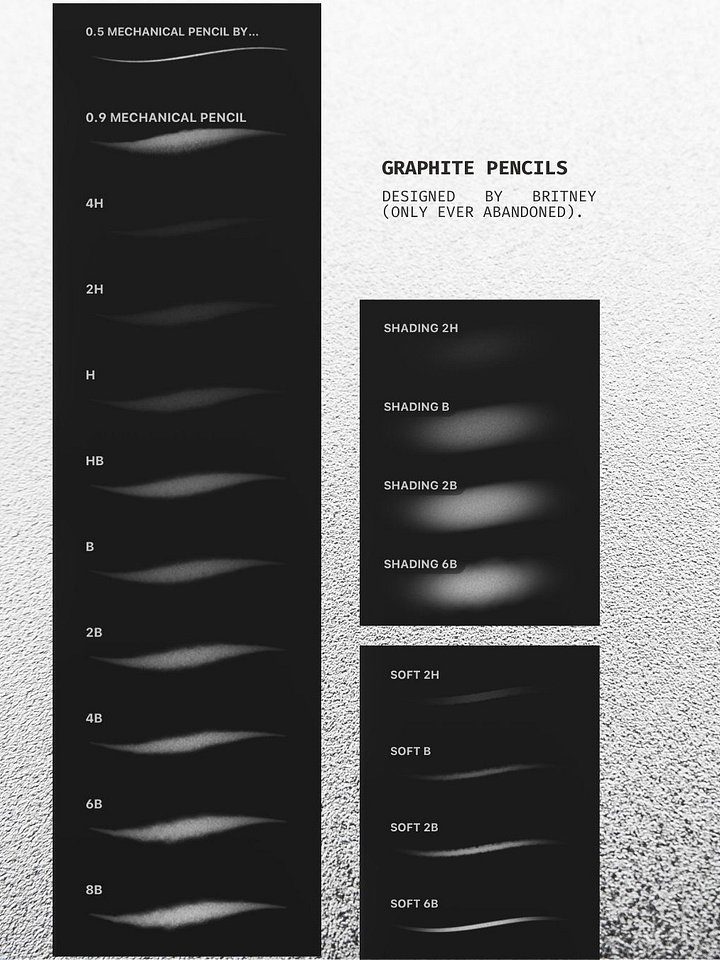
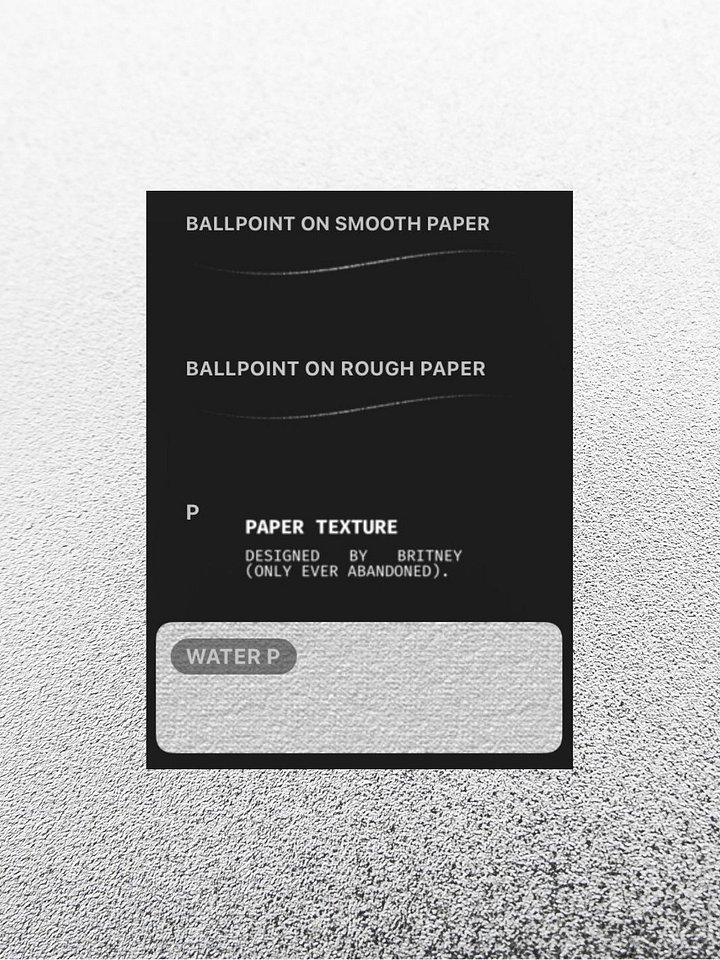
Brushes (Paintbrush): Accesses your custom pencil grades, ballpoint pens, and paper texture brushes.
-
Blender (Smudge Tool): Blends graphite using dedicated blending stumps or finger smudges.
-
Eraser: Selects kneaded rubber and detail erasers to lift values.
-
Layers: Manages tracing layers, blend modes (Multiply), and layer opacity.
-
Colour (Circle): Opens your color wheel and signature colour palettes.
Left Sidebar Sliders:
-
Top Slider: Controls Brush Size (stroke width).
-
Bottom Slider: Controls Brush Opacity (transparency/pigment density).
-
Bottom Curved Arrow: Undo previous stroke.
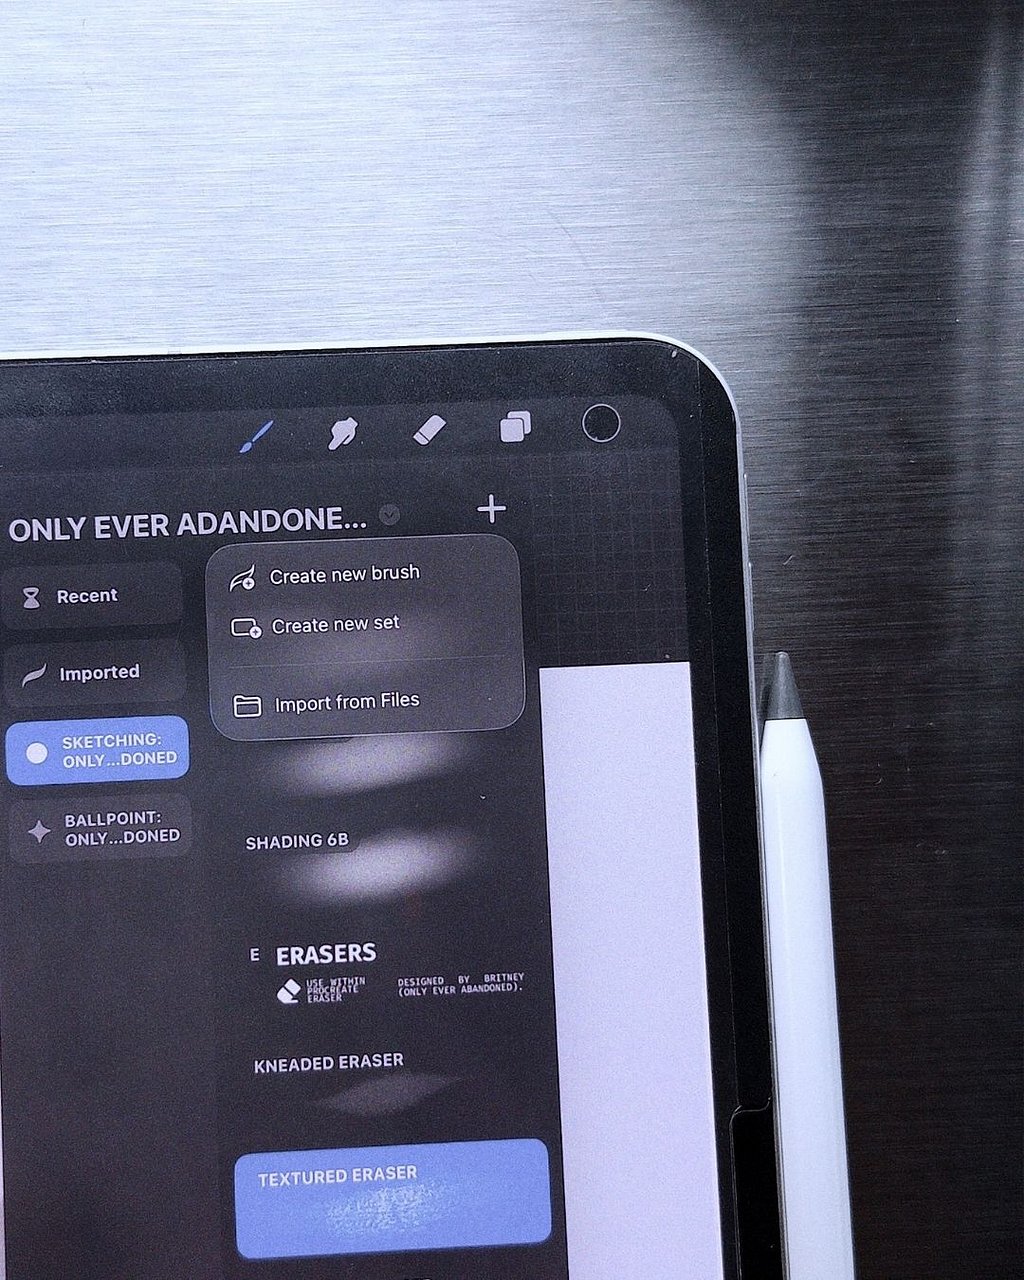
To load your custom brush packs from within the app:
-
Tap the Brushes icon to open your Brush Library.
-
Tap the
+icon in the top-right corner of the brush panel. -
Select Import from Files from the dropdown list.
-
Locate your downloaded
.brushsetfile, tap it, and Procreate will automatically install the entire set at the top of your library.
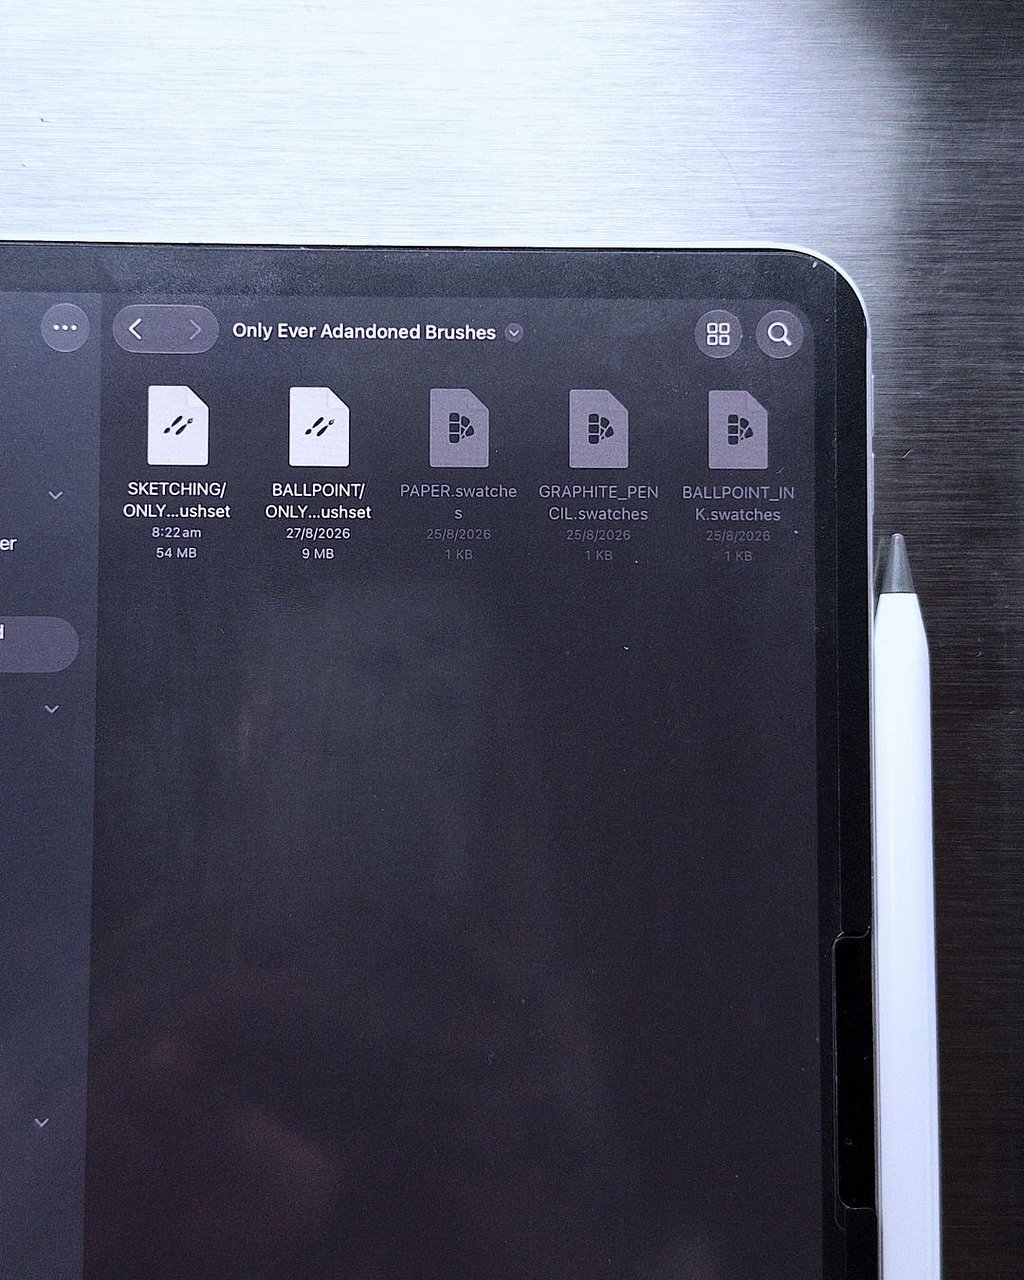
The fastest way to install everything (brushes and color palettes) at once:
-
Open your iPad's Files app and navigate to your Downloads or Only Ever Abandoned Brushes folder.
-
Simply tap on any
.brushsetfile, and it will instantly open Procreate and install the full brush collection. -
Tap on each
.swatchesfile. They will immediately load into your Procreate Palettes menu at the bottom of the list.

To set up a reference photo on its own layer for clean mapping:
-
Tap the Tools (Wrench / Actions) icon in the top-left corner.
-
Tap the Add (
+) tab. -
Select Insert a photo and choose your reference image from your camera roll.
-
Scale and position the photo on your canvas, then tap the Arrow (Select) tool to set it down.
-
Open your Layers panel, tap the
Non the photo layer to drag the opacity slider down to 20%–30%, then tap the+icon to add a fresh blank layer on top to start drawing.
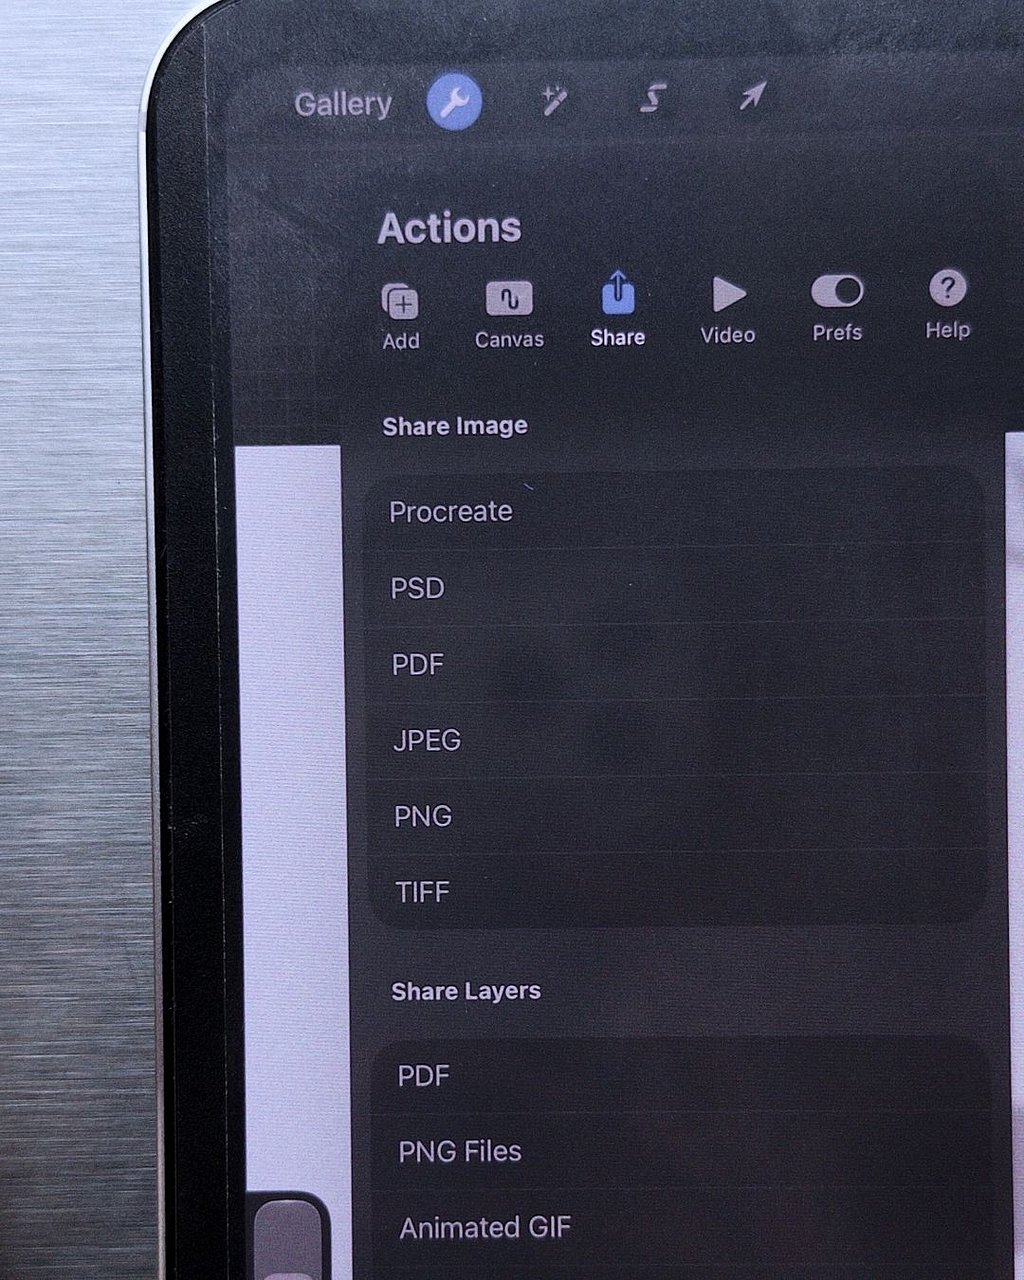
When your artwork is complete, export your files in the right format:
-
Tap the Tools (Wrench / Actions) icon in the top left and select the Share tab.
-
Choose your export format under Share Image:
-
JPEG / PNG: Best for posting directly to Instagram, TikTok, or your website.
-
PDF / TIFF: Uncompressed, high-resolution formats ideal for physical print-on-demand uploads and gallery prints.
-
Procreate (
.procreate): Preserves all individual layers, time-lapse data, and brush settings as a complete raw backup.
-